Friday, June 29, 2018

Bitter Gourd Curry ( Karivila Curry ) කරවිල කරිය  スリランカのゴーヤカレー


Bitter gourd is full of vitamins and minerals ,including vitamin A,C,Fe,Ca and beta carotene. This amazing powerful herbal vegetable has so many health benefits. Specially people use this vegetable to treat disease such as diabetics ,cholesterol , stomach and intestinal problems . Today I'm going to share with you, how i apply this Ayurvedic vegetable to my home cooking . Watch the above demonstrated video to better understand how to make a delicious Srilankan Style bitter melon curry while reading the written recipe below. 


INGREDIENTS:


METHOD :

1)Cut bitter melon into 3 pieces .Keep the pieces in salted water for about 10 minutes. (I usually add 3-4 tsp of salt )

2)Wash the bitter gourd several times in clean water .

3)Cut each piece in halves. Run the knife from top to bottom to remove the white pith. Keep aside.

4)In a small bowl ,soak tamarind in 3/4 cup of hot water until softened for few minutes .

5)Slice the pitted bitter gourd into length-wise strips .

6)In a large bowl, mix together bitter gourd strips ,chili powder ,a pinch of salt ,black pepper powder , Sri Lankan unroasted curry powder,a hint of turmeric ,clove ,cinnamon ,cardamom ,Indian tamarind (goraka) ,fenugreek seeds ,curry leaves and squeezed tamarind water .

7)Heat 2 tbsp of olive oil or another cooking oil of your choice in a sauce pan on high heat . Temper black mustard seeds until they start popping or bring out the nutty flavour. 

8)Gradually add crushed garlic ,thinly sliced onions ,pandan leaves and green chilies. Stir-fry until slightly browned .

9)Slowly add the earlier prepared bitter gourd mixture into it . Cook covered on medium heat until all the water has been evaporated .

10)Add thick coconut milk and bring it to boil on medium heat . 

11)Then increase the heat to high. Sprinkle salt to taste and continue cooking uncovered until the gravy becomes slightly thick .

12)Transfer the cooked curry to a serving bowl and allow it to cool . 

13)Serve this tasty bitter melon curry over a bed of the brown or white rice of your choice.

ENJOY !!!

Now ,if you are interested ,let's learn the ingredient list in Japanese .


***To prepare the unroasted curry powder, you need only these ingredients. Add all the ingredients into a spice grinder and grind into a fine powder.  It's done .


Tuesday, June 26, 2018


Fruit Sandwich Bento / පළතුරු සැන්ඩ්විච් ලන්ච් බොක්ස්


Fruit sandwich is very popular amid Japanese .  it's super easy to make at home in no time .  All you need is few slices of white bread ,whipped cream and fruits . If you haven't tasted it yet ,give this simple and delicious recipe a try . Check out the above video to better understand how to make it as an open fruit sandwich while reading the written recipe below .


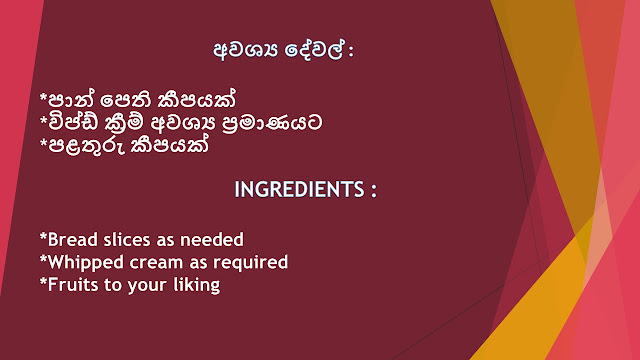
INGREDIENTS :


METHOD :

1)Remove the edges of bread slices and keep aside .

2)Cut the fruits into pieces or you can use cookie cutters to make shapes .

3)Lay a piece of wax paper the same size as the bread slice on a cutting board .

4)Place a piece of cling film on top of the wax paper .

5)Spread the whipped cream on the bread slices and set aside. (Add 15 g of granulated sugar per 200 ml of cream )

6)Arrange the fruits to your liking on the cling film to the size of the wax paper .

7) Place the bread slice with the cream side down on top of the fruits .

8)Trim off any excess fruits around the bread slice using a sharp knife and turn upside down .

9)Now it's ready to serve .  But if you want to make the sandwich more elegant and sweet ,decorate the top with jam or melted chocolate like the way I do in the video .

10)This sandwich perfectly goes well with tea or coffee . As well as you can add it to your children's lunch boxes with some veggies ,snack and salad of your choice to make it more healthier .

Enjoy !!!

Now ,if you are interested let's learn the ingredient list in Japanese ...


Thursday, June 21, 2018


Sri Lankan Dhal Curry තෙල් නොදා හින්දපු පරිප්පු කරිය...

Dhal curry is a traditional Sri Lankan dish that everybody love to have with their meals. This's the very first recipe i learned from my mother and really happy to get an opportunity to share with you all today .  Watch the above video to know the steps of making this delicious and nutritious curry while reading the written recipe below .


INGREDIENTS :


METHOD :

1)Wash the lentils in several changes of water until water is clear . Usually it takes 3-4 washes.

2)Discard the water well .

3)Transfer the washed dhal into a little bit larger saucepan .

4)Add Fenugreek seeds ,thinly sliced onions ,sliced green chilies ,Maldive fish ,curry leaves ,pandan leaves , crushed garlic ,chili powder and turmeric .Mix well while adding 2 cups of water until all the ingredients are well combined.

5)Place the saucepan on high heat and cook the dhal closing the lid until all the water has been evaporated .

6)Add thick coconut milk and a pinch of salt . Give a good stir with the help of a spoon .

7)Cook again on high heat without the lid , until the liquid dries off . ( Bear in mind to check the taste of salt and add more, if required before the curry becomes dry. )


8)Transfer the curry to a serving bowl and allow it to cool . Serve this delicious dhal curry with the white or brown rice.


*** Now if you are interested ,let's learn the ingredient list in Japanese too ...


Tuesday, June 19, 2018


Healthy and Easy Japanese Potato Pancake / රසගුණ පිරි ජපන් අල රොටී..

I guess many of you are concerned about healthy eating like me right ? But,if you're not already on the health train it's time to get aboard ,just giving this simple ,healthy ,quick and easy Japanese potato pancake  recipe a try.  Which has no gluten flour at all . Check out the above detailed video to know the steps of making this super easy pancake,while reading the written recipe below .


INGREDIENTS :


METHOD : 


**Let's prepare the dipping sauce first ..

1)in a small bowl, combine soy sauce ,vinegar ,sesame oil,chopped leeks and a dash of sesame seeds .

2)set aside until ready to serve with the pancake .

**Now ,let's make the potato pancake ...


1)Grate the potatoes on the small holes of a grater.(Don't apply much pressure as we want fairly thin shavings.)

2)Combine grated potatoes ,chili flakes ,salt ,chopped onions ,thinly sliced green chilies and corn starch in a large bowl .


3)Heat 2 tbsp of olive oil or another cooking oil of your choice in a larger frying pan. Slowly add the prepared potato pancake mixture and spread it out evenly .


4)Cook on medium heat until the mixture sets and golden on the bottom for about 5 minutes or more .


5)Flip upside down and cook for another 5-10 minutes until it reaches a golden brown color too .


6)When the pancake is ready,Serve it with the dipping sauce made earlier on the side .


Enjoy !!!


**Now ,if you are interested ,let's learn the ingredient list in Japanese too ...


Friday, June 15, 2018

Sri Lankan Style Thick Curd / නියම මීකිරි පදමට එළකිරි මුදවමු ...


I'm so excited to share my family recipe of how to make village style thick curd at home from fresh milk to the same texture of Buffalo Milk Curd with you guys today . Be sure to Check out my above video to know the steps of making this delicious curd . I'm pretty sure you will like the taste very much .


INGREDIENTS :


METHOD


1)Boil milk until reduced to half, stirring occasionally to prevent burning on medium heat for about 20 -25 minutes.

2)Remove the milk from the heat and allow it to cool to 
110 F0 - 120 F0.

3)In a small bowl , mix well 80 g of yogurt or curd from a previously homemade batch or you can either use store-bought ones. (It's easier to mix the yogurt starter if added some warm milk to it .)

4)Add the prepared yogurt or curd mixture to the warm milk and give a good stir using a whisk until completely incorporated .

5)Strain the mixture using a fine mesh strainer into a jug.

6)Pour the milk into jars and seal them .

7)Place the jars into the rice cooker and fill the bowl with hot water that is a little hotter than warm water to cover the jars up to 3/4 .

8)Let stand the jars undisturbed in the rice cooker for about 6-8 hours covering well with a clean thick cloth .

9)Once the curd is set ,pop the jars in the fridge for about 6-7 hours for further setting or to make it more thicker .  ( There will be a thin layer of water on top of the curd.so, to drain the liquid cover the jars with kitchen paper towel before keeping it in the fridge .)

This tasty homemade thick curd can keep in the refrigerator for about a week or two though it's absolutely safe to eat as long as the taste good to you .

**Now ,if you are interested , let's learn the ingredient list in Japanese too ...


French Baguettes ෆ්‍රෙන්ච් බගෙට්ස් ගෙදර හදමු...


Baguettes are among the most popular types of bread in the world . It's not simple to make the real texture at home if you don't have much experience on it . Here i'm sharing my secrets of making delicious baguettes with you guys today . Hope, you will watch the above video to the end while reading the written recipe below .


INGREDIENTS :


METHOD


1) In a small bowl combine sugar ,yeast and warm water . Stir and let the mixture sit for about 10 minutes until the yeast is well activated and starts to foam .


2)In a large bowl mix the flour and salt with the help of a wooden spoon and gradually add in the yeast mixture , water and olive oil . Mix it well until the dough comes into a ball .


3)Transfer the dough onto a wooden board .


4)Cut a piece of the dough using a scraper and place it on top of the dough. Again, cut off another piece of dough and place it on top of the dough . Repeat this process until you have a soft dough for about 6 minutes .(Watch the above video )


5)Place the dough in a lightly-oiled bowl and cover with a piece of cling film.  ( You can also use a damp cloth to cover the bowl )


6)Let the dough sit in a warm place for about 1 hour .


7)Turn out the dough onto a floured wooden board .fold and stretch the dough for about 3 minutes. Transfer it into the bowl and let it rest for another one hour for the second time .


8)Then again fold and stretch the dough for about 2 minutes and return the dough into the bowl and let it rest for about 40 minutes for the 3rd time.


9)After the dough has fermented for about 2 hours and 40 minutes,divide it into two equal pieces and preshape the baguettes following the instructions of the above video . Allow the dough to rest for about 10 minutes before the final shaping .


10)Make the final baguette's shape.


11)Place the shaped loaves ,seam side down ,onto a lightly floured proofing cloth to rest for about 30 minutes covering with a slightly damp cloth . ( Create ridges in between each baguette to keep separate will help the shaped loaves hold its shape.)


12)After 30 minutes , gently transfer the baguettes to a parchment -lined baking tray with the help of a cutting board . (Seam side down )


13)Using a cutter knife or blade lame, score the top of the baguettes and dust some flour . ( Slash the baguettes at a 45 degree angle 4 to 5 times along the loaf axis )


14)Bake the baguettes in a preheated oven at 482 F for about 15 minutes, then reduce the heat to 446 F and continue baking for another 15 -20 minutes, until golden brown. The optimum baking time depends on your oven .( Spray water on both sides of the oven before placing the baguette tray and after the first 15 minutes repeat the same process .)


Enjoy !!


** Now ,if you are interested  ,let's learn the ingredient list in Japanese too ...


100 % Whole Wheat Bread /යමගටා ප්ලේන් බ්‍රෙඩ් මෙතඩ් එකට ආටා පිටි පාන් .


If you are interested to have a piece of soft and delicious 100 %whole wheat (Atta ) bread for the healthy breakfast . Watch the video to the end while reading the written recipe below.


INGREDIENTS:


METHOD :

1)In a small bowl combine yeast ,sugar and warm water .  let it stand for about 10 minutes until the yeast  blooms and foams .

2)In a separate bowl mix the flour ,salt ,milk powder and egg using a whisk . Gradually add in the yeast mixture and water.Mix all the ingredients well for few minutes .

3)After the dry and wet ingredients are incorporated , turn out the dough onto a lightly floured wooden board. Knead the dough until smooth and soft for about 5 minutes .

4)Divide the dough roughly into 3 parts and add butter to each .  Continue kneading the dough for few more minutes until elastic and slightly sticky . ( Usually i knead the dough 60-70 turns )

5)Do a windowpane test to check the gluten development  . If the gluten is well-developed ,the dough will stretch into a paper -thin film (A very thin translucent sheet )without tearing . If the dough quickly tears,keep kneading for several more minutes .

6)Let the dough rest in a lightly- oiled bowl for about 1 hour until double in size,covered with a piece of cling film in a warm place .

7)Do a finger poke test to determine the dough has risen enough.  Poke a finger in the dough and make an indent  .If the indentation remains and the dough doesn't bounce back . The dough is ready for the next step .if the indentation disappears ,the dough needs a little bit more time.

8)Divide the dough into two equal pieces.  Roll a piece of dough into a log following the instructions of the above video . Repeat with the remaining dough .

9)Put the logs ,seam-side down in a buttered loaf pan. Place the loaf pan in a plastic bag and let it sit for about 45 minutes until double in size .

10 )Brush the top of bread with milk and bake it in a preheated oven at 356 F for about 30 minutes until golden brown. After about 20 minutes of baking ( At the last 10 minutes )cover the top of the bread loosely with aluminum foil to prevent over -browning. The optimum baking time depends on your oven .


11)Remove the bread from the oven and let it cool in the pan for about 30 minutes . Unmold the loaf and allow it to cool completely on a wire rack .


Enjoy !!!


***Now if you are interested ,let's learn the ingredient list in Japanese too ...


Sri Lankan Tea Buns スリランカのティーパン ( レーズンパン) These traditional sweet tea buns, known as tea ...

Mos Viewed